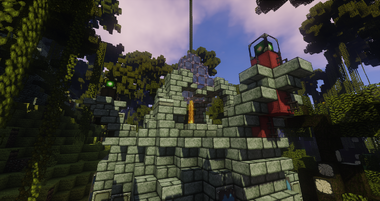
Modules can be added to Territory Generators and inhibitors to help either defend or destroy the TGen. Modules are separated into Offensive or Defensive modules. Offensive modules are only available for inhibitors and defensive modules for Tgens.
The defensive Tgen modules are linked with one of the TGens power sources and will go offline if its respective Power Source is overloaded during an attack. A generator can have a maximum of 4 modules.
The attacking inhibitor modules are again linked with its power sources but instead of being deactivated when a lamp is destroyed, the module becomes weaker and less effective. Inhibitors can have a maximum of 1 module.
You cannot equip an attacking module when fighting against a neutral territory, as the generator will also have no modules.
Defensive Modules[]
Buff Module (Green)[]
- Increases the health of golems to 200% (+100%).
- This module is limited to 1 per Generator.
Debilitating Aura (Blue)[]
- Whenever Golems are hit by a melee attack, they will debuff nearby enemies with Slow II that blocks pearling and gives Mining Fatigue I.
- This module is mutually exclusive with Vicious Attack.
- This module is limited to 1 per Generator.
Laser Module (Purple)[]
- Fires a laser at a single target doing increasing damage over time to the player and nearby players until the target leaves its range.
- If you have multiple laser towers they will not all target the same player.
- Lasers will not target you through blocks.
Lingering Death Module (Black)[]
- Fires a laced potion at nearby enemies every 30 seconds that creates a bed of lingering blocks at its location. Enemies who walk on these blocks will gain the bleed debuff if they walk through it.
- Bleed - does some damage per second
Slow Module (Cyan)[]
- Fires a laced potion at nearby enemies every 30 seconds that creates a bed of slowness blocks at its location. Enemies that walk through this cloud will receive Slow II and be unable to throw Ender Pearls.
Spectral Module (White)[]
- All enemies in the territory who are charged will glow to your team.
- If there are only 5 players alive remaining on the Attacking Side, all enemy players will become permanently glowing with Spectral. A
- Any attacking player that gets a charge off will be debuffed with Spectral Lockdown.
- Spectral Lockdown - Cannot damage any Golem Protectors for 60 seconds
- This module is limited to 1 per Generator.
TnT Module (Red)[]
- Fires primed TnT at enemies within range and deals heavy knockback and damage.
Vicious Attack (Brown)[]
- Golems will perform a new attack after teleporting, which causes all nearby enemies to be immediately knocked back and receive a 10 second bleed. Golems will perform this Vicious Attack when randomly teleporting to enemies and when teleporting to a player after being struck by an arrow.
- Bleed -
- This module is mutually exclusive with Debilitating Aura.
- This module is limited to 1 per Generator.
Note: All modules (where applicable) have a 35 block range activation.
Offensive Modules[]
There are 4 versions of each offensive module, where each subsequent one is less effective. This is because they lose power for each lamp that is destroyed on your inhibitor. Where damage or percentages vary between the different versions, 4 values are listed in decreasing order (e.g. 40% / 30% / 20% / 10%).
Pearl Bomb (Magenta) []
- Whenever an attacker throws an Ender Pearl, it has a 15% / 10% / 10% / 5% chance on landing to spawn an Endermite bomb that will deal 8.0 / 7.5 / 6.5 / 5.5 hearts of damage when it explodes.
- This is the same Endermite Bomb from the Core and will be subject to friendly-fire checks (won't blow up attackers), nor can they be damaged by the attacking team.
- Sweeping attacks do not damage Endermites.
Tactical Rush (Orange)[]
- When attackers warp, allies within 35 blocks of the inhib gain Focused Charge for 240 seconds / 195s / 150s / 120s. Allies who die in the Battle Zone will drop an allied healing zone on the ground for 60 seconds / 50s / 40s / 30s that heals for 2 hearts per second.
- Focused Assault - You cannot be slowed and on death a healing circle is temporarily left on the ground that only affects your side.
Golem Override (Lime Green) []
- When attackers warp, Inhib Golems become Empowered with 300% / 200% / 200% / 100% base health and all defender (Territory Generator) modules will become disabled. Each Empowered inhibitor golem will re-enable the paired TGen Defending Module. This lasts for 50% / 40% / 30% / 25% of the duration of the warp cooldown.
- Empowered - Golems are immune to projectile damage and have 200% total health.
Supercharged (Yellow)[]
- Whenever you kill a golem, your charge lasts 35 seconds / 30s / 25s / 20s and all allies within 10 blocks gain Thick Skinned and Debuff Resistance for 120 seconds / 90s / 60s / 30s.
- Thick Skinned - You are immune to all bleed effects.
- Debuff Resistance - You are immune to debuffs, and any debuffs active when applied will be immediately purged.
Chain Reaction (Light Blue) []
- Whenever a lamp is damaged, another randomly chosen defending Golem will become Stunned for 20 seconds / 15s / 10s / 5s.
- Stunned - Golems are immobilized and will die in one melee hit.
Shield Wall (Light Gray)[]
- When blocking with a shield, you mitigate 100% / 80% / 60% / 40% of Conquest Damage. You heal for the amount of conquest damage mitigated, gain 2 / 2 / 1 / 1 absorption hearts and take no knockback.
- On warp, if you have a shield equipped you gain 2 absorption hearts.
- Conquest damage is all direct damage done by the generators defences. This includes golems, laser modules, TnT modules, core damage and living bombs.
Module Costs[]
The cost of moduling Generators varies based on a number of factors. It is always a large quantity of a random resource. Every Generator has a set resource for the whole conquest month and it only changes at the end of the truce. You can find out what resource it requires by speaking to the NPC inside the Generator. You can also find out the resource and number required, by right-clicking on the lamp on the exterior of the Generator and hovering over a module.
Each resource is split into one of three categories, based on how easy it is to obtain and how abundant it is. Each group determines how many of the resource is required to add a module. The harder to obtain (high tier) resources require less, and the easier to obtain (low tier) resources require more.
Continents[]
The cost goes up depending on the number of modules you have in your empire.
| Number of Modules | High Tier Cost | Medium Tier Cost | Low Tier Cost |
|---|---|---|---|
| 1 - 20 | 64 | 128 | 256 |
| 21 - 40 | 128 | 256 | 512 |
| 41 - 60 | 256 | 384 | 768 |
| 61 - 80 | 320 | 512 | 1024 |
| 81 - 100 | 384 | 640 | 1280 |
| 101 - 120 | 448 | 768 | 1536 |
Balak[]
The cost is static.
| Number of Modules | High Tier Cost | Medium Tier Cost | Low Tier Cost |
|---|---|---|---|
| 21 - 40 | 128 | 256 | 512 |
Rivina[]
- All modules are free.
- You may only have two modules.
Capital Bountifuls[]
- All modules are free and can be changed/set during the 2-hour warm up time.
Inhibitors[]
Moduling an inhibitor is always free and is picked at the point of activating an inhibitor.
How to Add a Module[]
Right-click on the Generator lamp, hover over the module of choice and shift-click. If you ever wish to remove a module for some reason you can follow the same steps to do so. However, there is little reason to do this as you can change your modules for free during the 1-hour warm-up time prior to a fight. This is known as Module Roulette.
If the Generator is a capital bountiful tile, then the only way to add modules is during the 2-hour warm-up time prior to the fight. This is the only time where you can do this regardless of whether the generator has pre-existing modules or not. This is done by typing /c list and clicking on the active fight.
Module Roulette[]
- In the hour after activating an Inhib and before the fight starts, all installed modules on both sides become blacked out visually. You will be unable to see which module is which.
- Both sides have the optional ability to change which module(s) they have already installed in order to play the enemy in their strategy. Once the Inhib goes online and the attack starts, the modules will be revealed.
- Swapping out mods does not cost extra, you already paid up-front for your mods.
- You are able to remotely swap out your mods in /c list by clicking on the active fight.
- You can only do this if your generator already has modules equipped.

